Whether it’s for Halloween, a comic/games convention, or just to scare your friends, zombie makeup is all the rage these days. Pulling off a costume that can actually scare someone takes a little time, but with the inexpensive list of items below you can make a zombie that will have everyone who sees it recoiling in horror.
Materials
- Liquid latex – makeup quality, can be found easily online or at your local costume store around Halloween. If you can’t get ahold of it you can sub in non-toxic glue, like Elmer’s, but it will take longer to dry and also requires many coats to reach the same thickness.
- Torn up tissue paper – I separate the ply of bathroom tissue so I’m working with single sheets.
- Makeup – black, red, some dark brown or maroon, and optional white for the rest of the face. I use crappy Halloween face paints.
- Makeup Applicator – sponge, q-tip, etc…
- Fake blood – dark corn syrup with food coloring in it. 6 parts red to one part green, keep adding color until it looks right to you.
- Crappy clothes – neither you or your subjects should be wearing anything you’d mind terribly getting a whole lot of food coloring on it.
- A well-shaved face – super serious about this one, latex is not easy to remove from even the shortest facial hair.
Step 1:
The first thing you need to do is decide what injuries you want your zombies to have, and then you need to place a base coat of latex. You want to clearly define your goals at this point and try to keep your base a bit smaller than the end result you’re aiming for; your makeup is going to keep creeping outward from here. The wound you decide on may affect the best way to paint on your base coat.
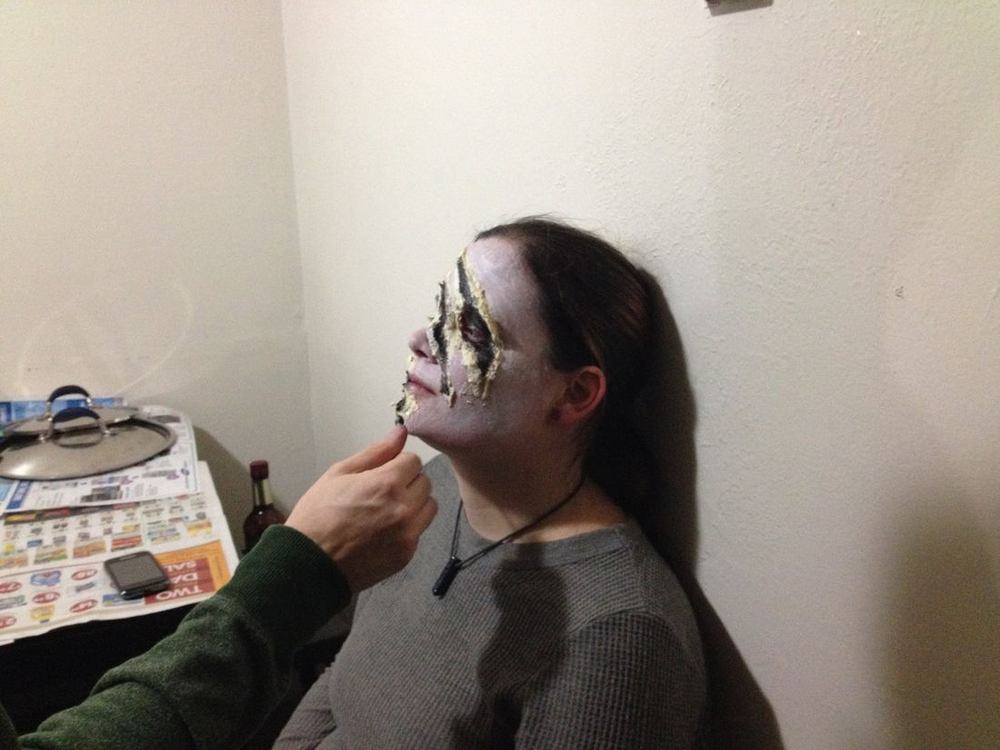
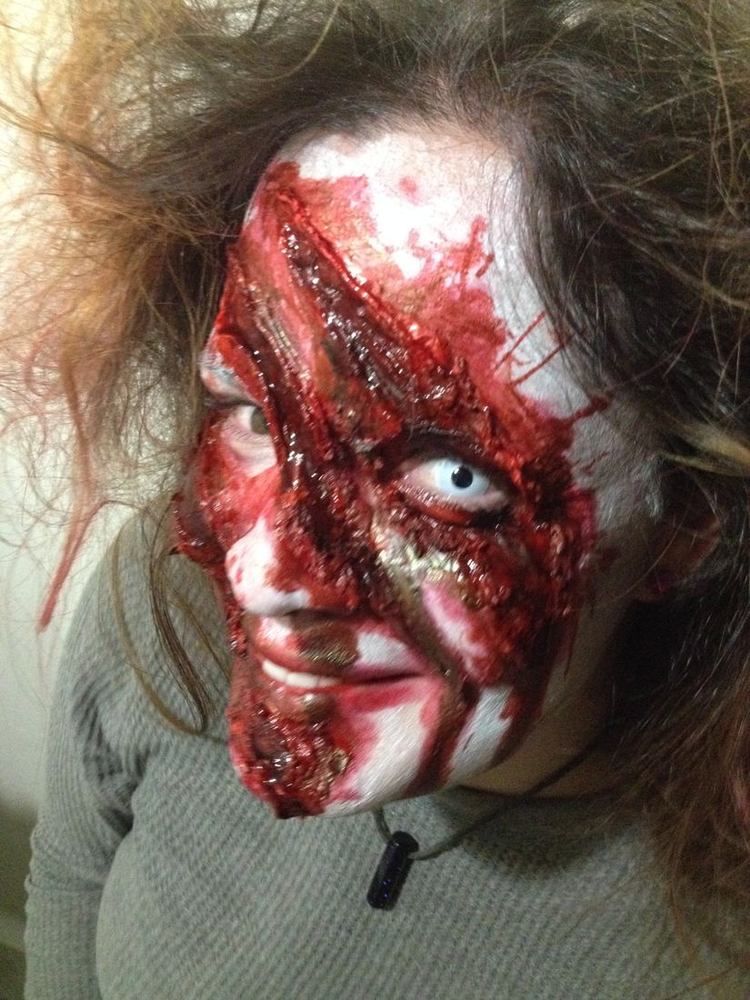
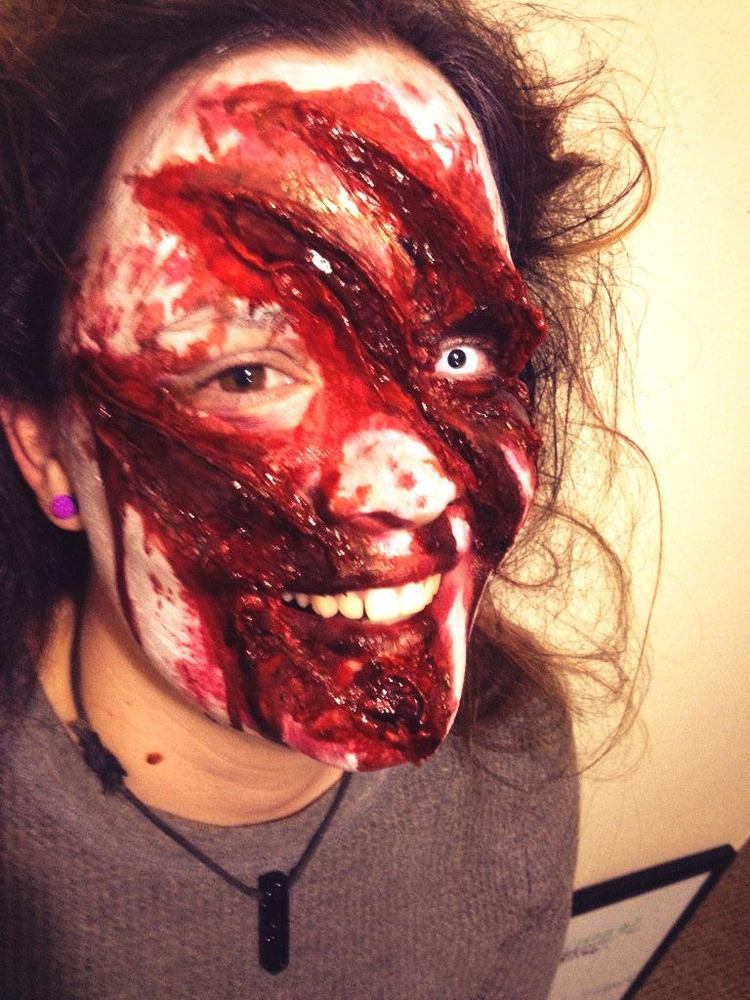
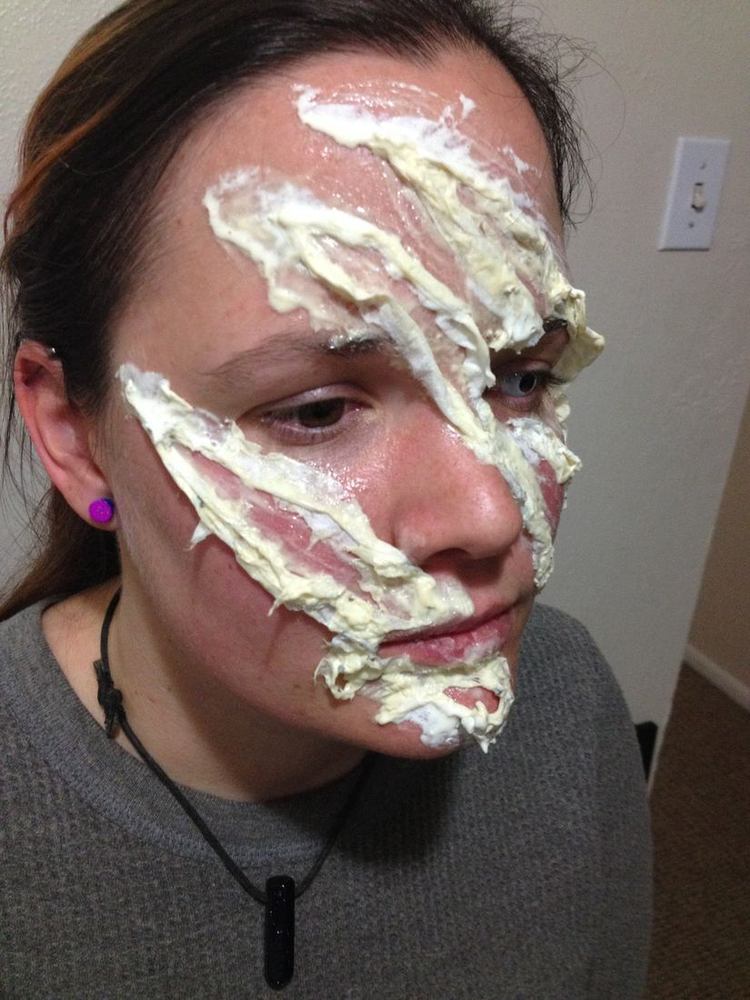
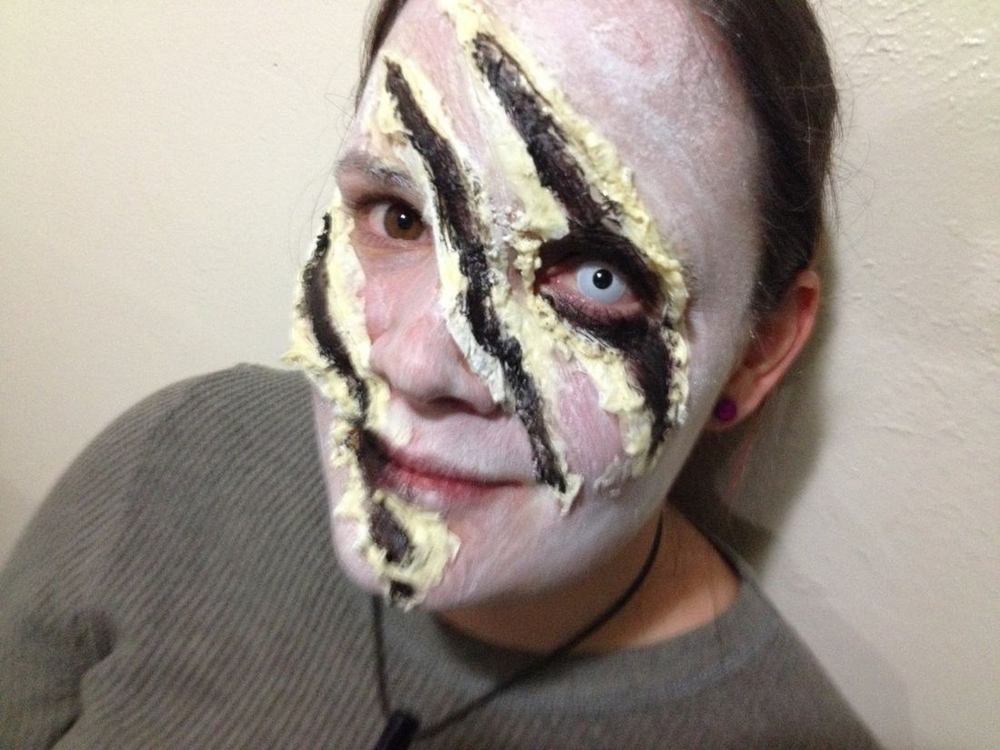
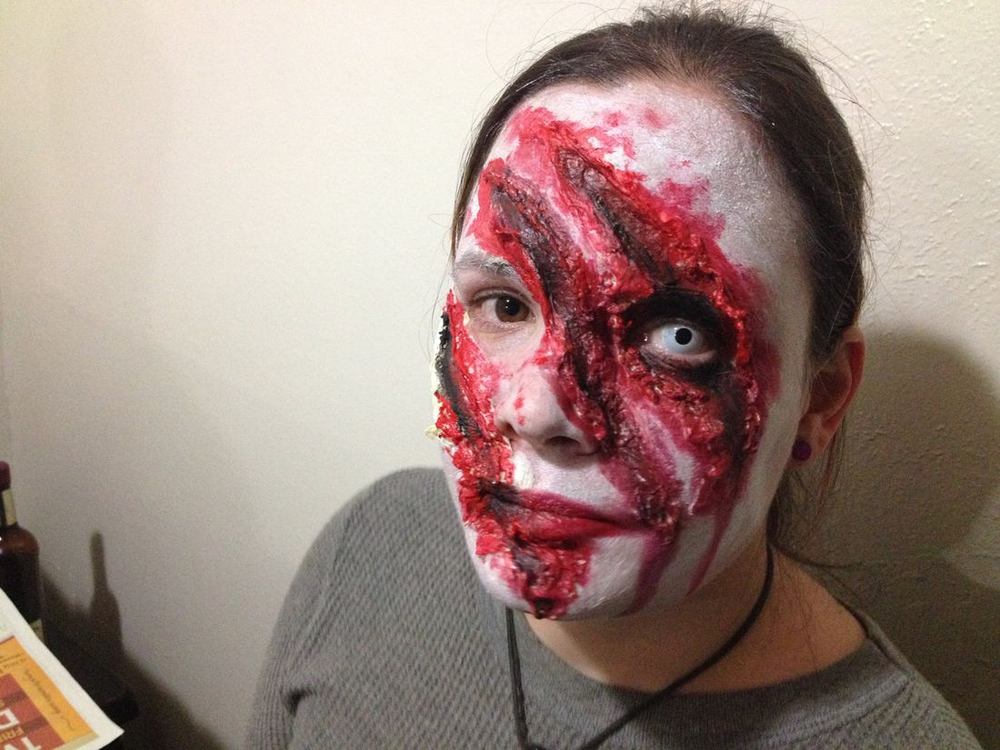
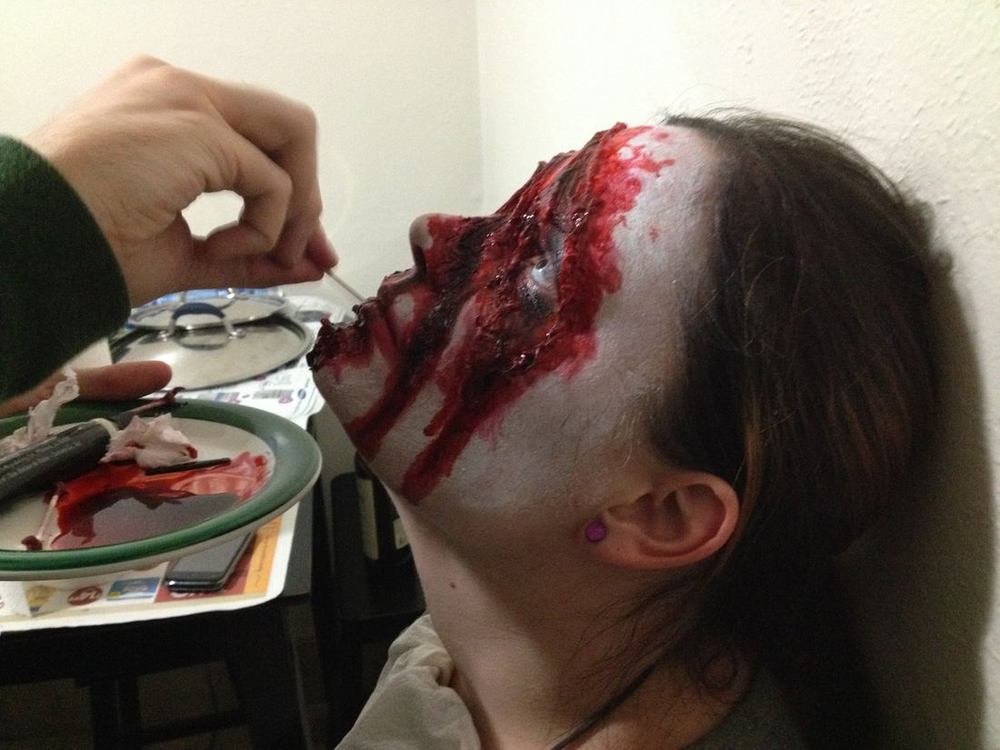
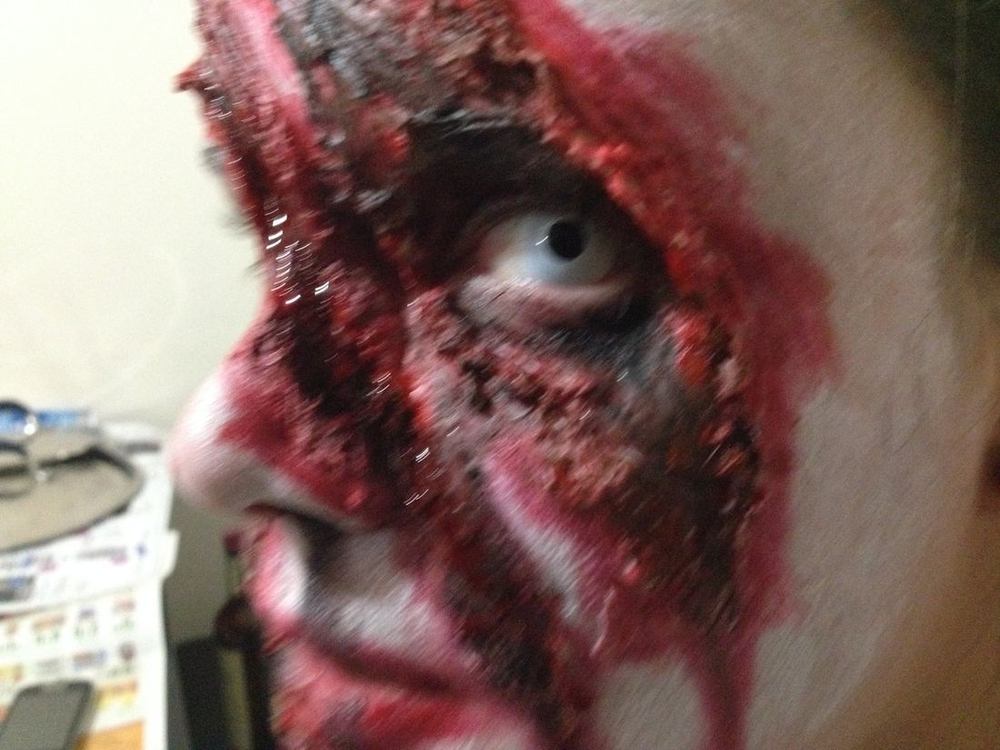
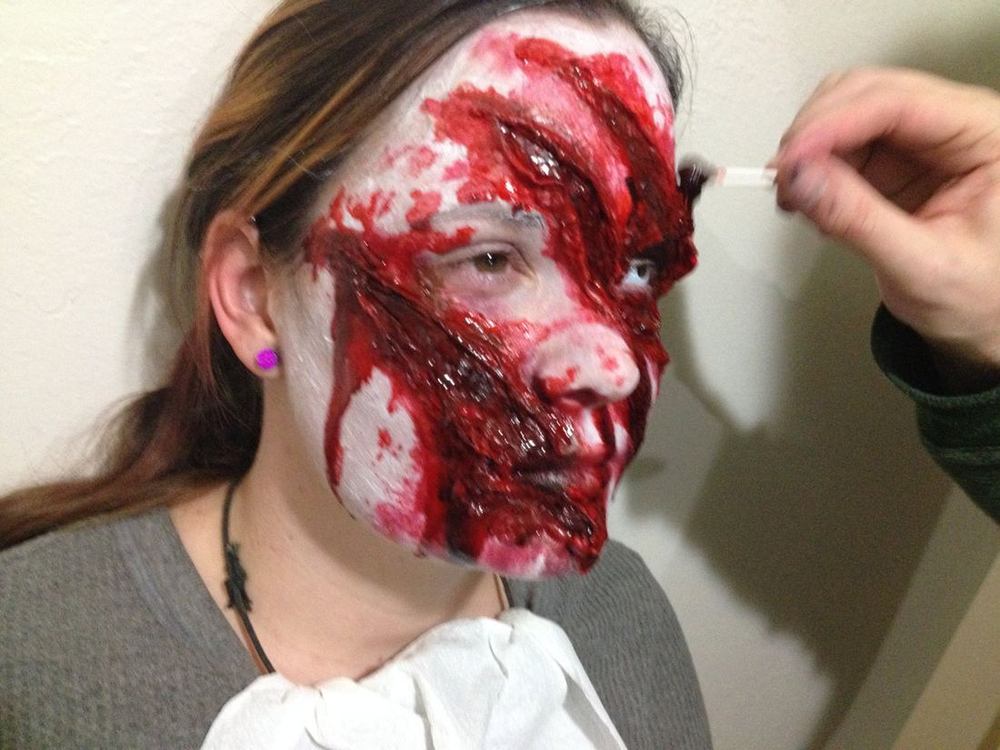
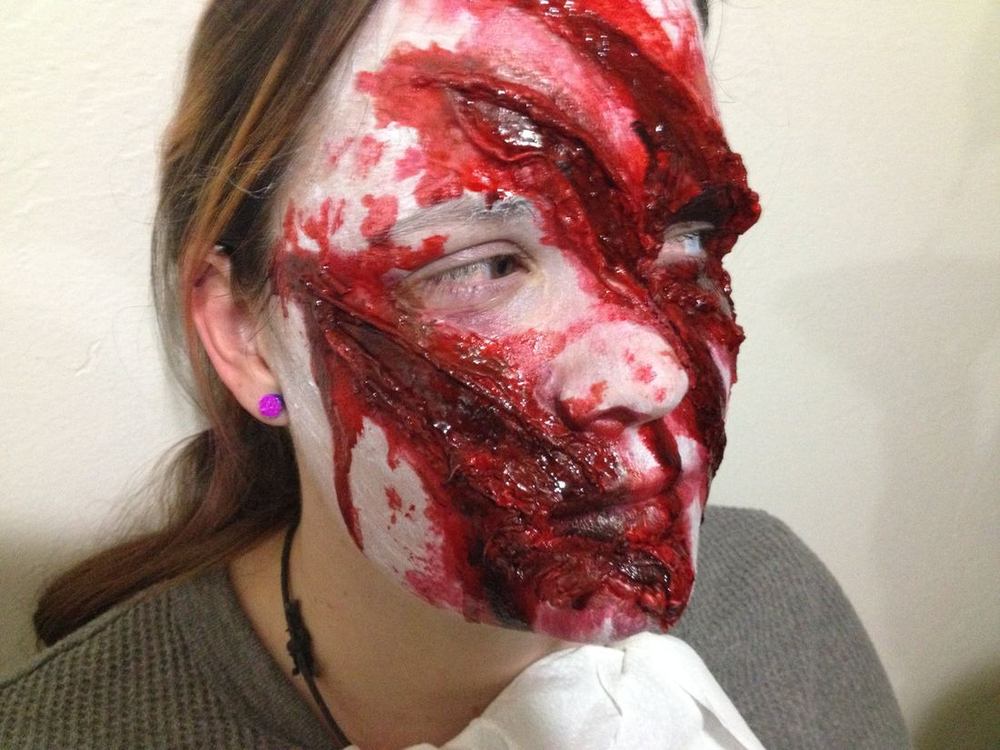
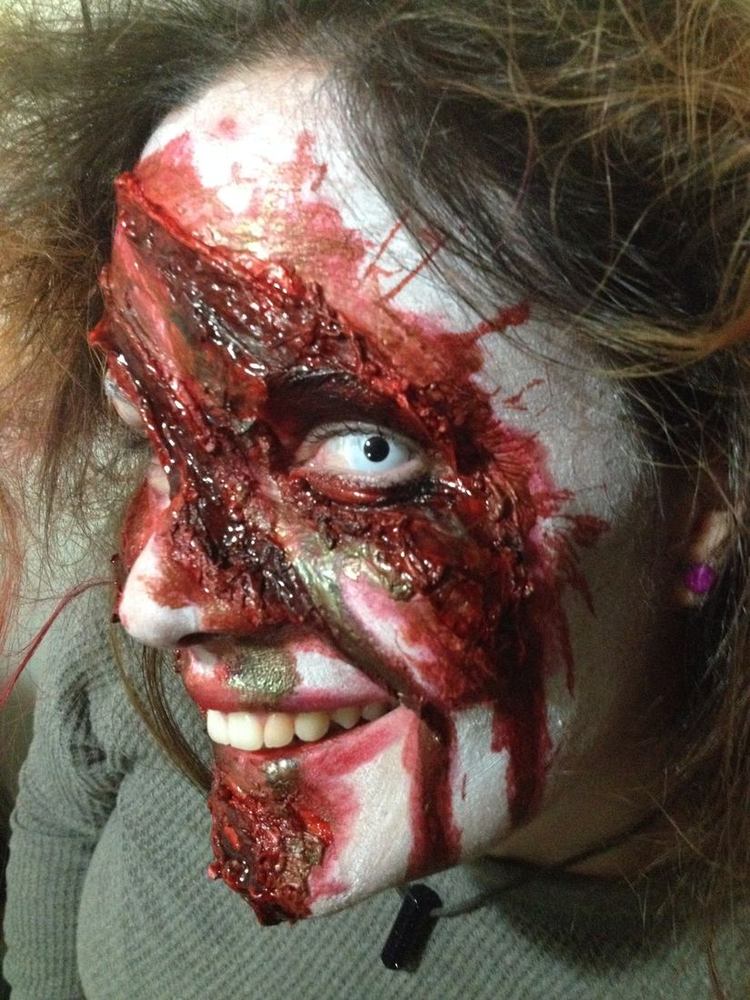
For my friend Danielle, we decided on three diagonal lacerations across her face, so we painted on the edges of the lacerations, while leaving the center of each split largely untouched. This gives us anchors for the heavier bits of the wounds while avoiding bulking up the centers and setting up a nice depth for the slashes.
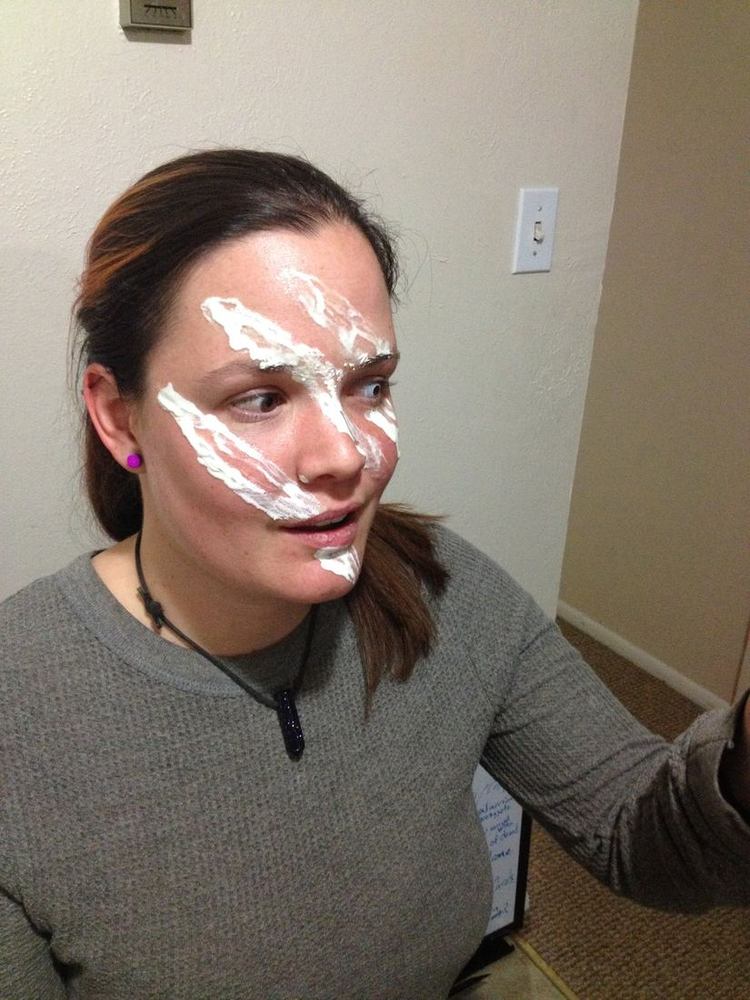
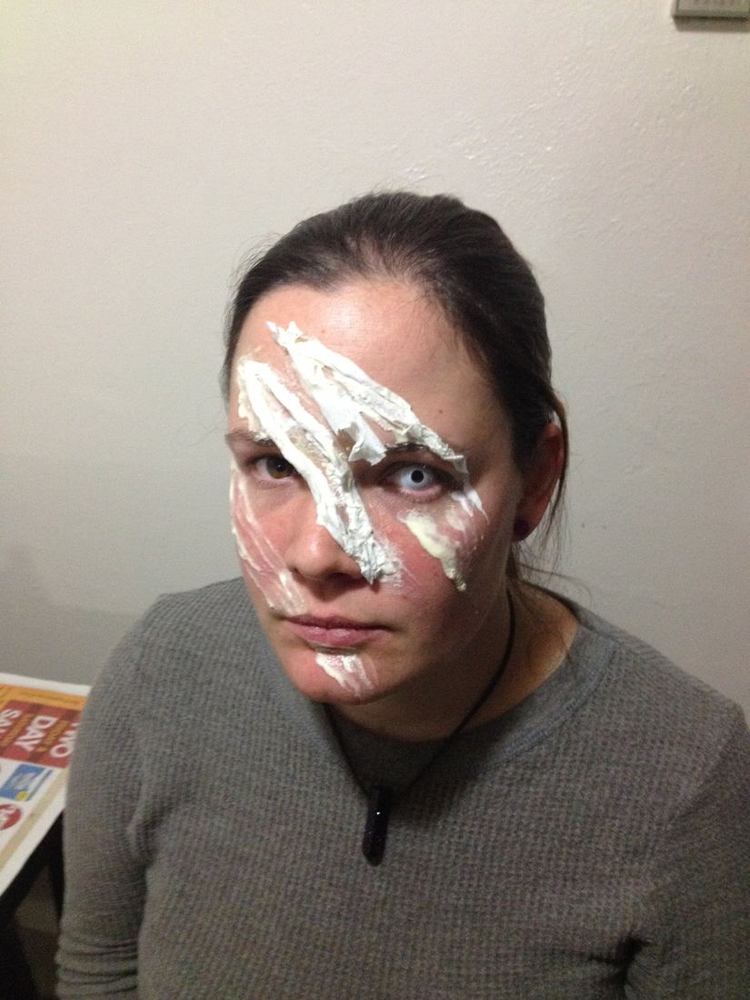
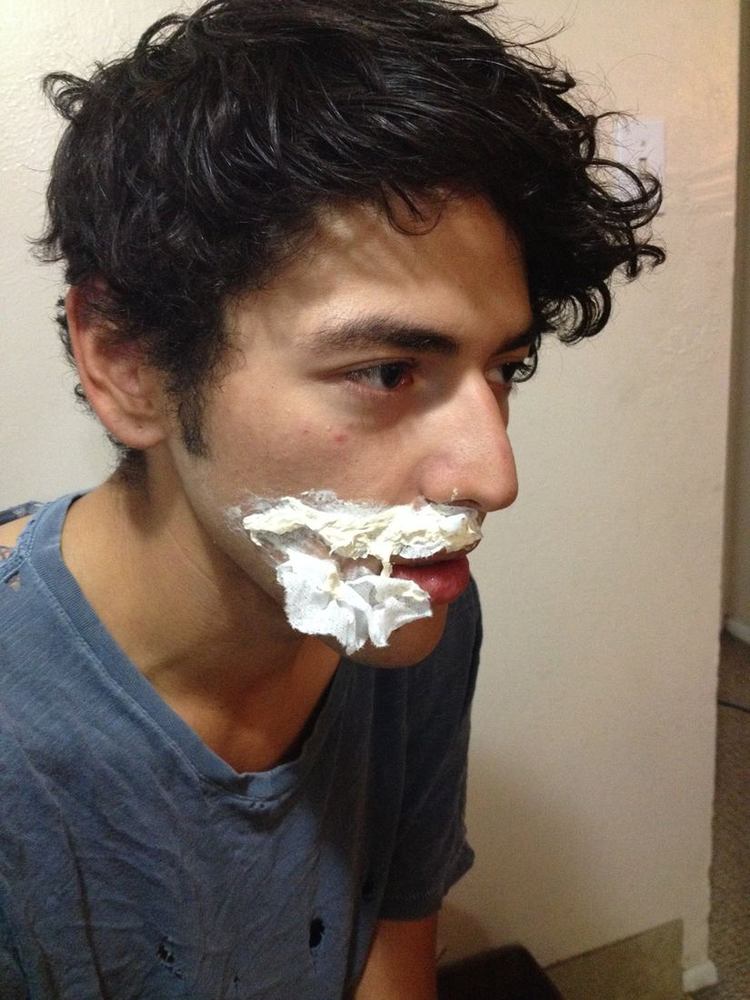
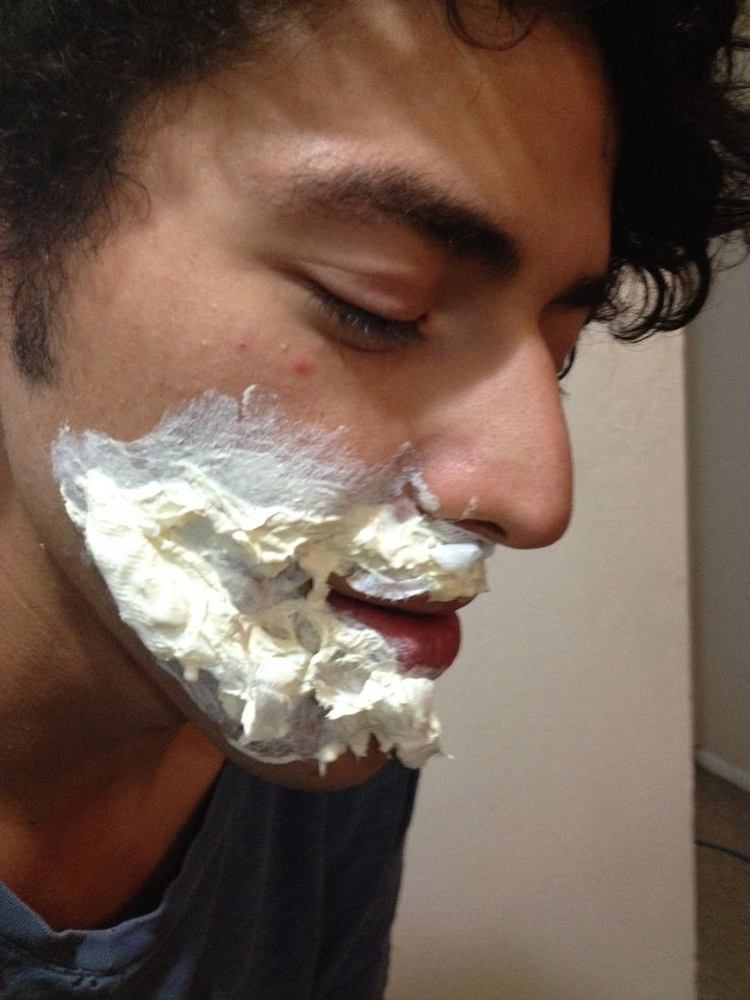
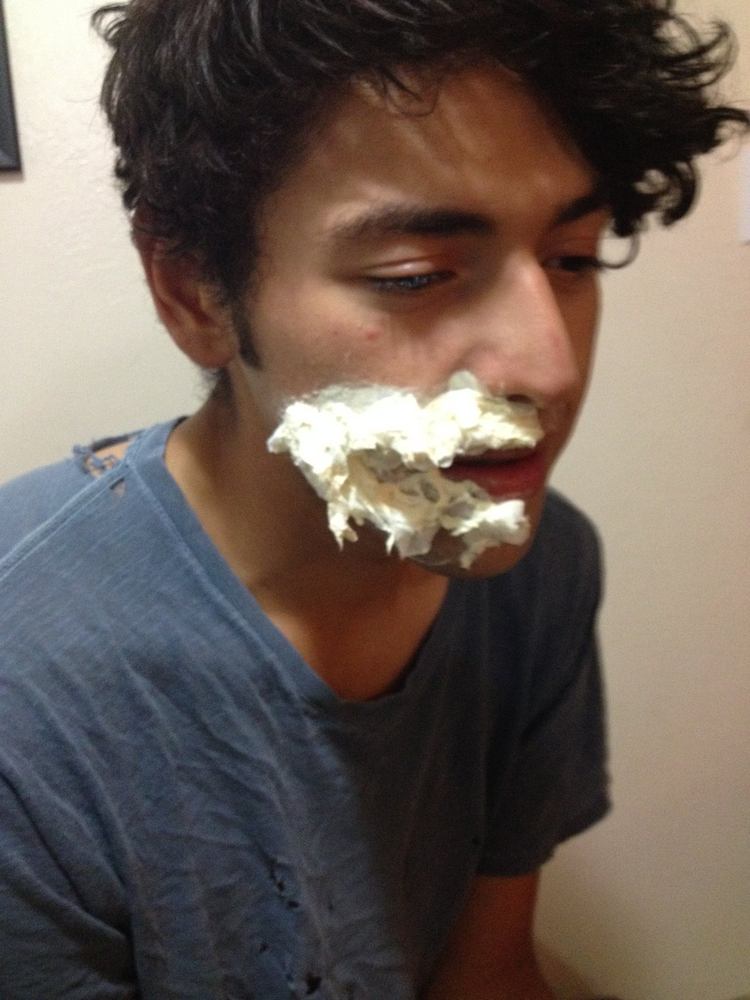
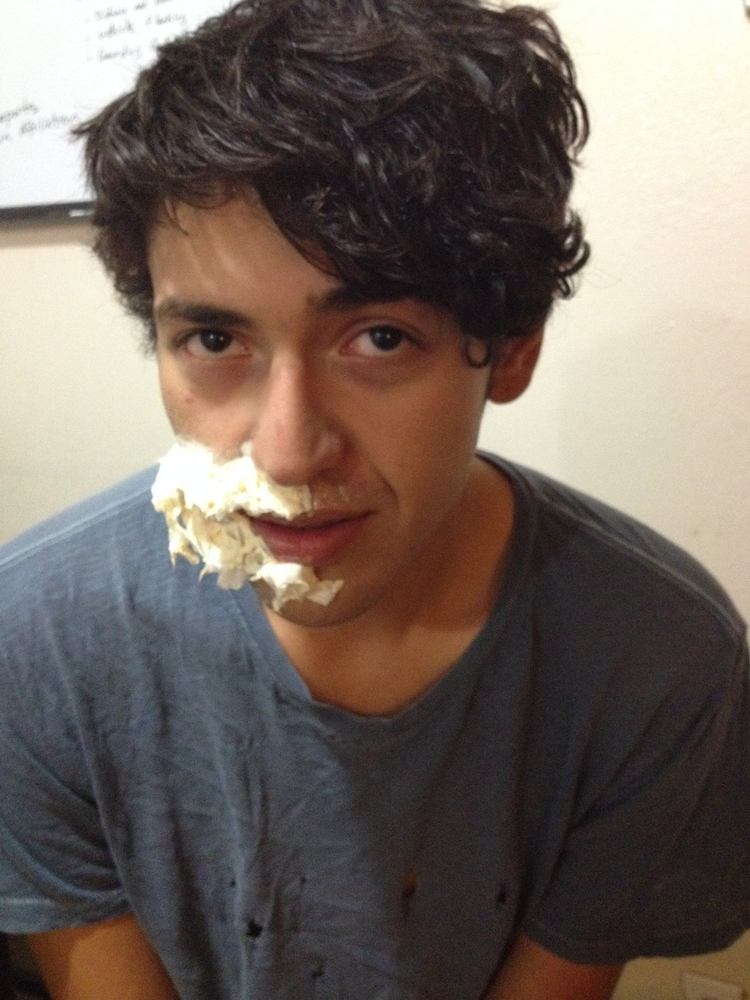
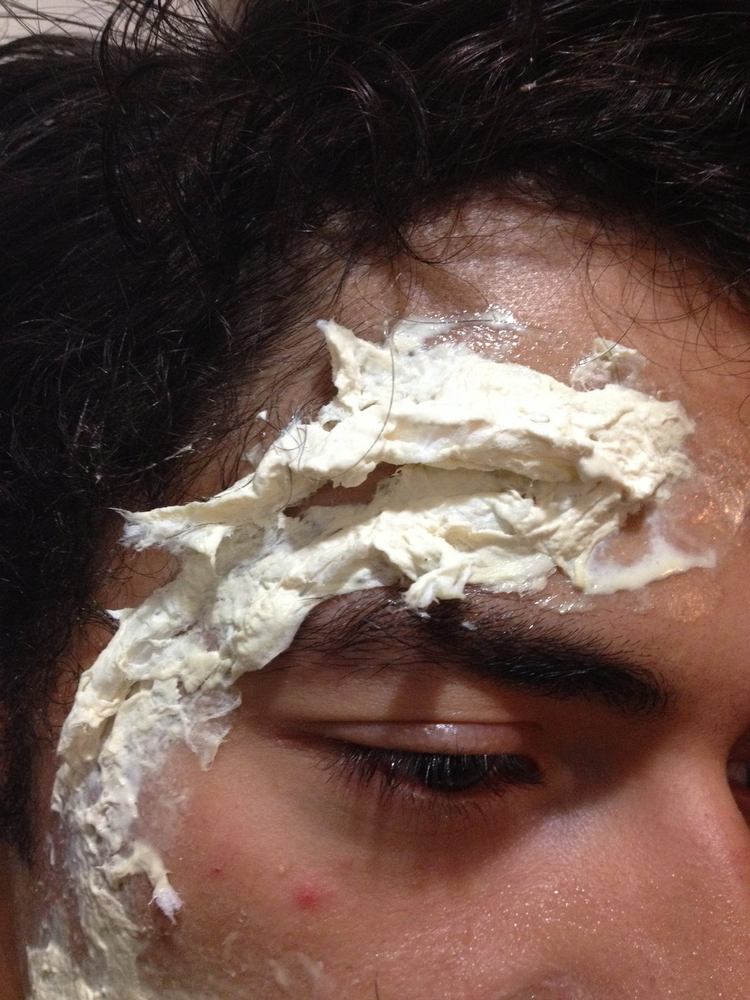
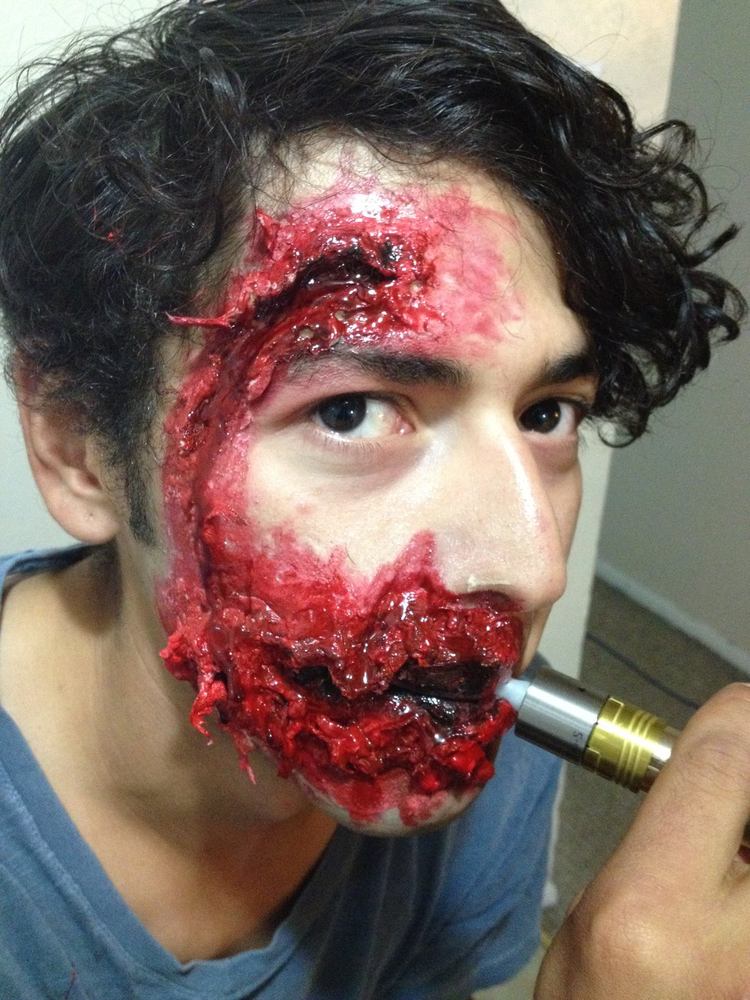
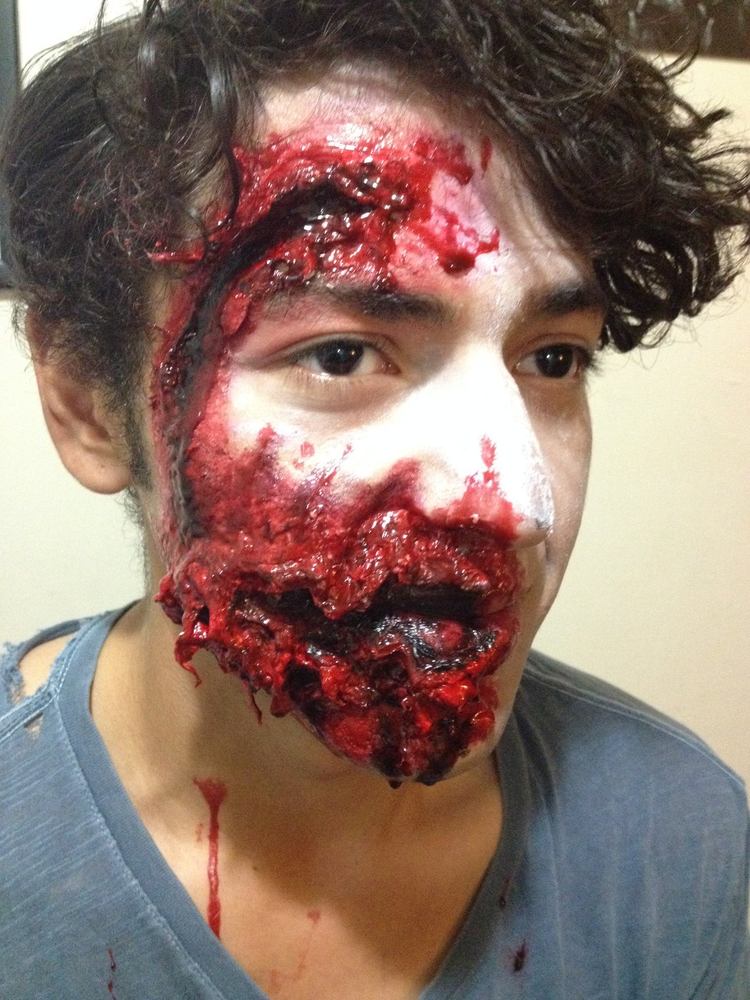
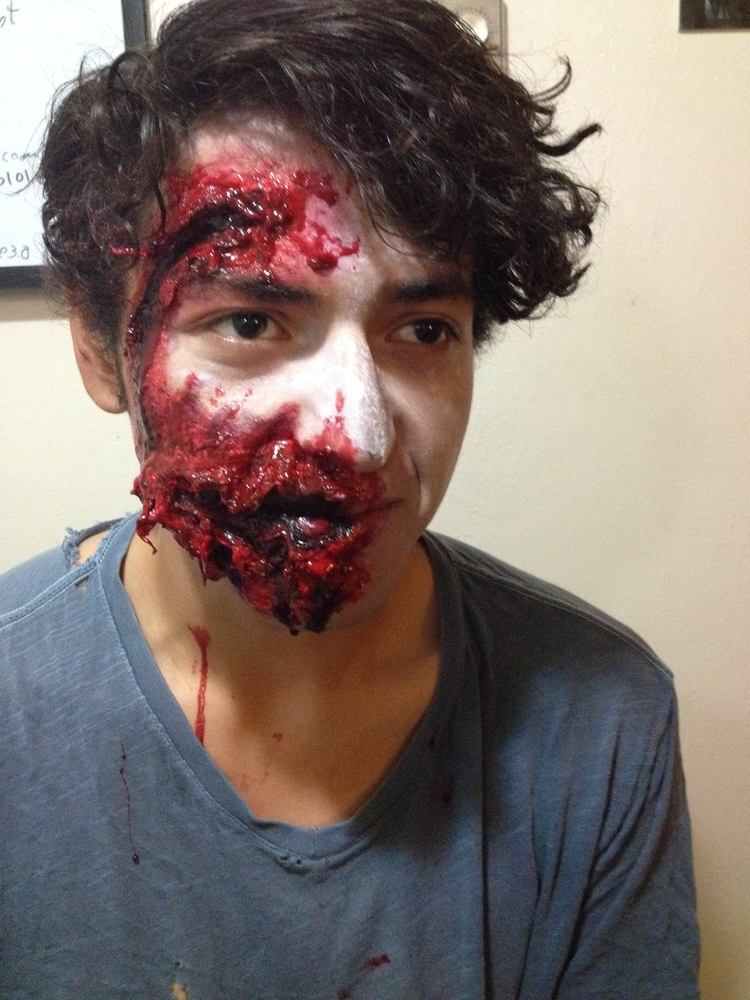
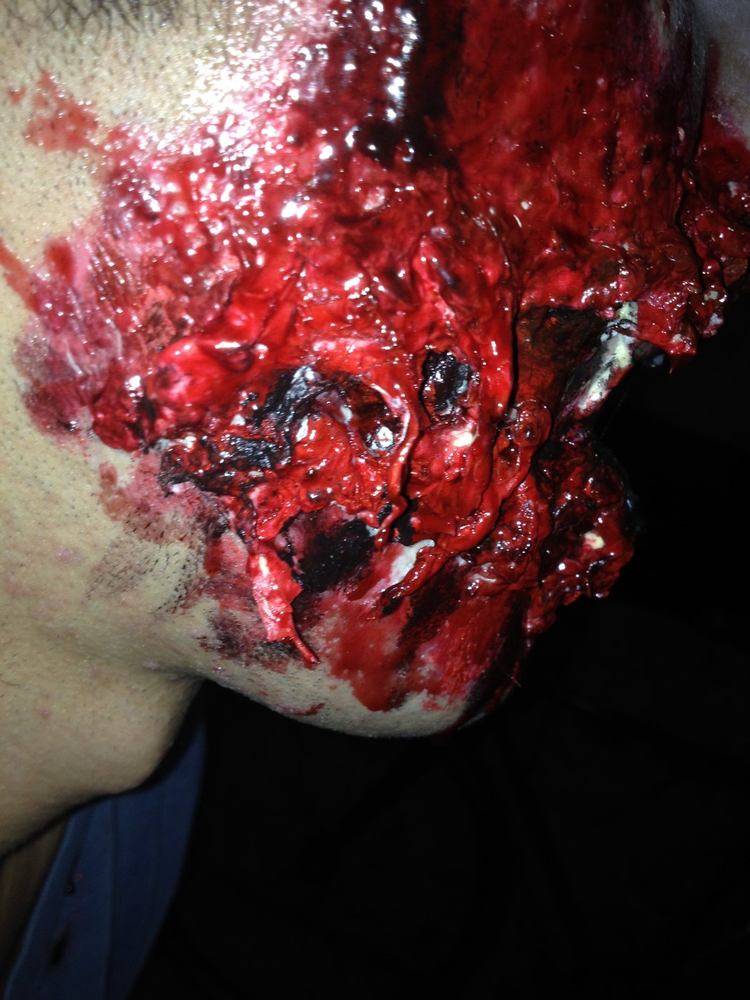
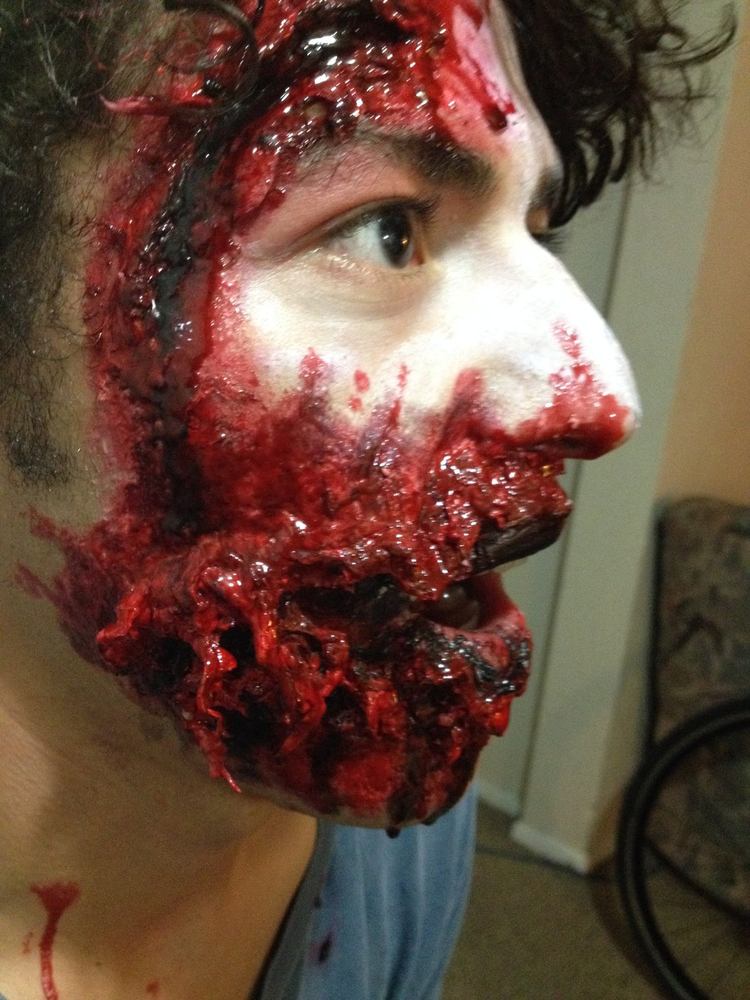
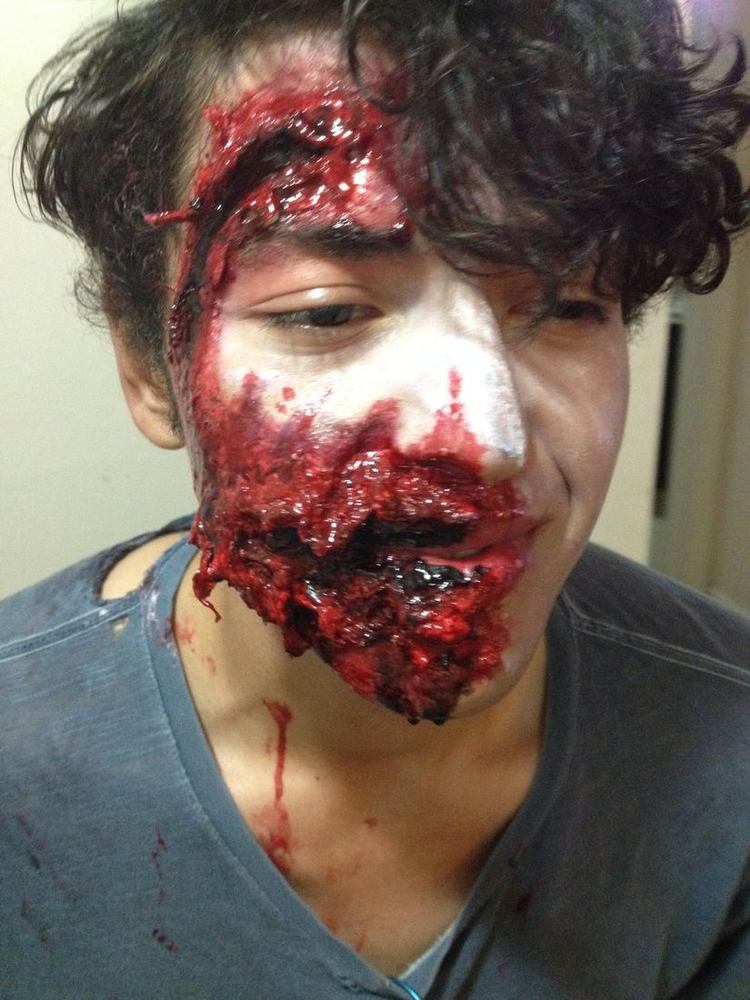
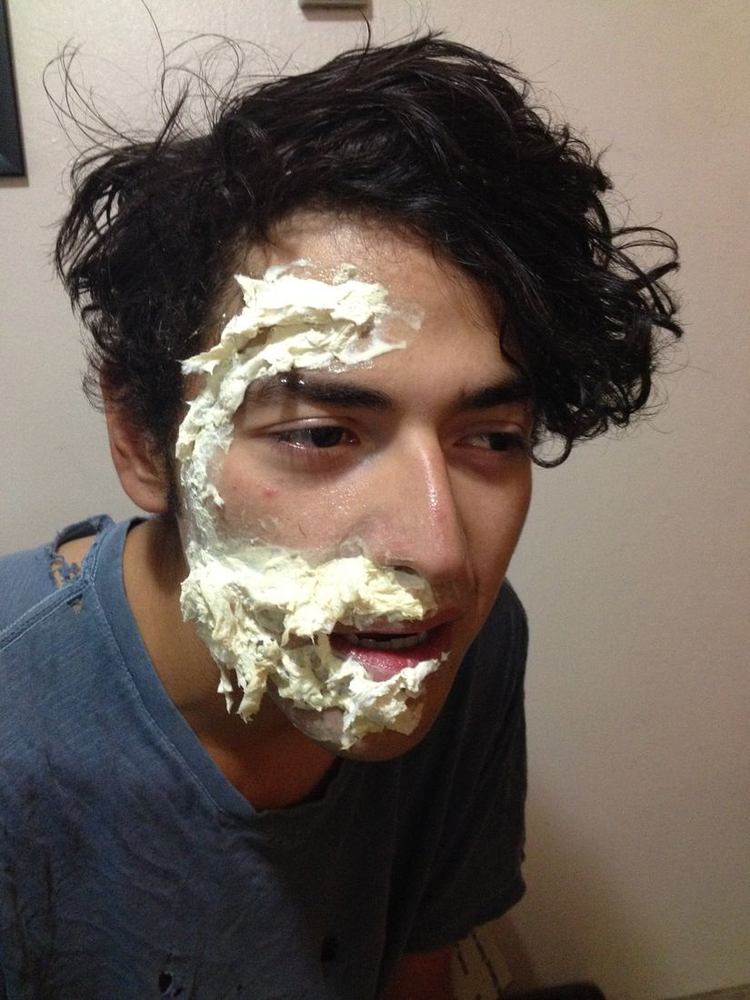
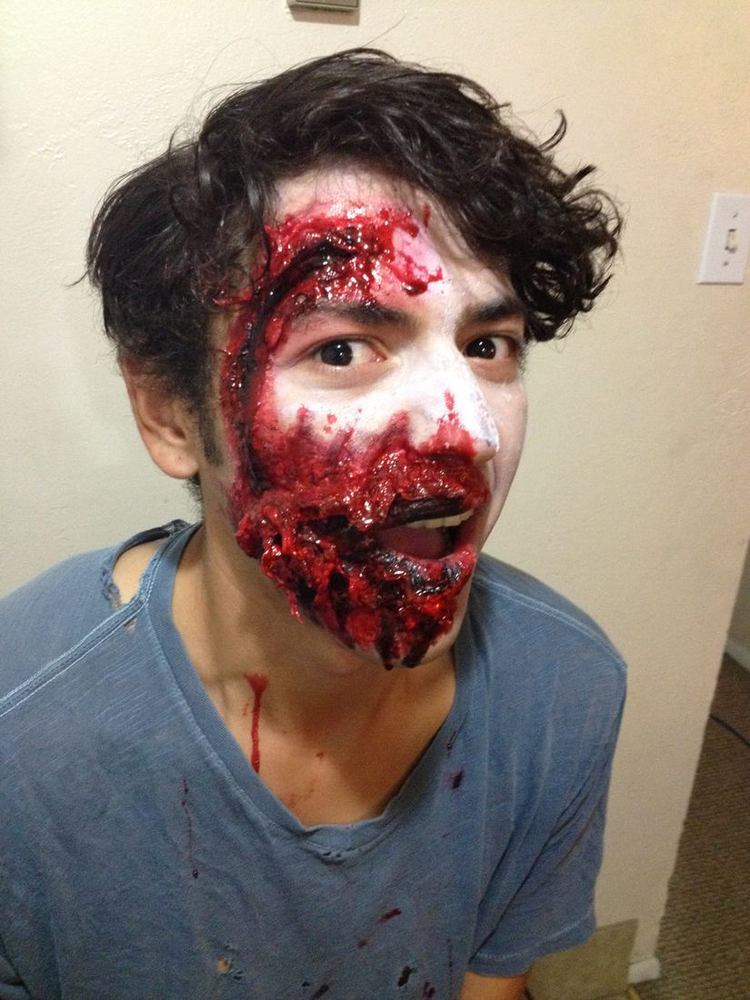
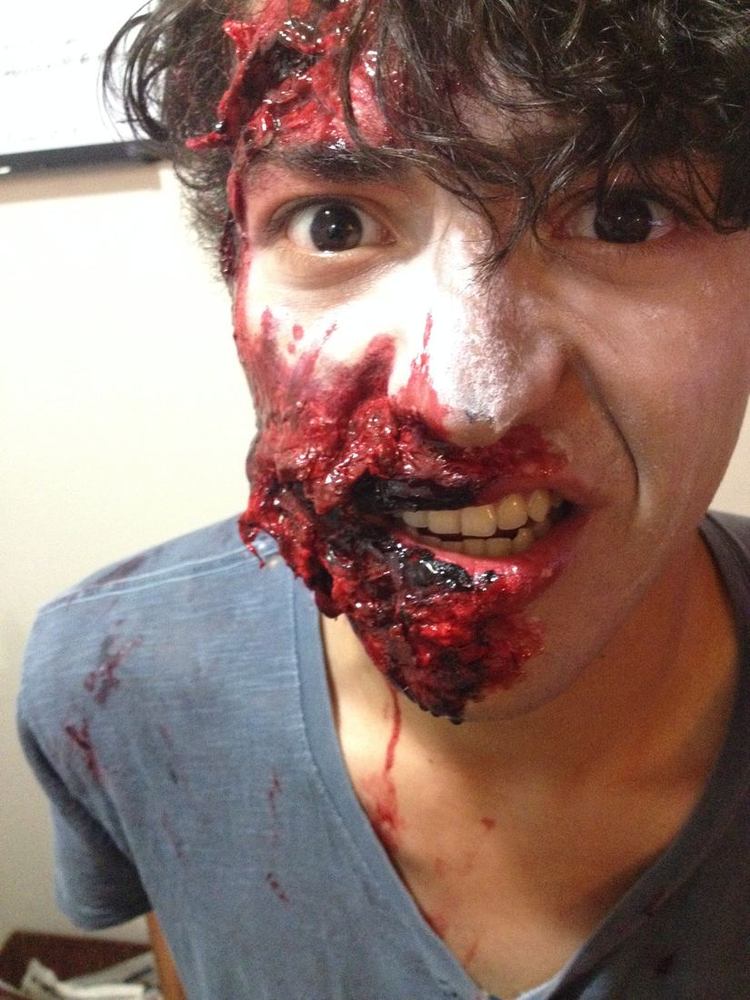
For my friend Danny we decided on another approach, we wanted to tear half of his mouth away, like someone had gotten a near-miss on a headshot. After painting on a thick layer of latex, we tore some paper with ragged edges, dipped it in the latex along one side, and applied it to his face mostly dry, creating shelfs of torn paper along the top and bottom of the wound. These provided an anchor for all the nasty mess we planned to pile on top.
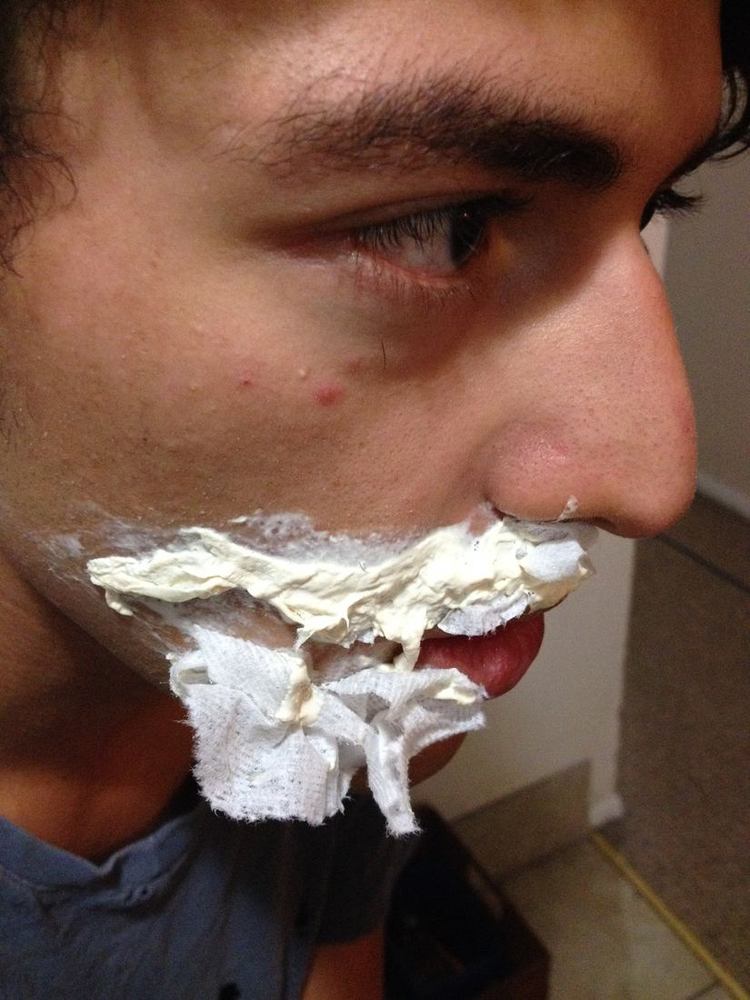
The ideal base will differ depending on the kind of wound you’re going for. If you’re planning a large, ragged wound, try applying a piece of paper torn to roughly fit the shape of your wound-area after painting the latex directly on the skin. This will provide a nice, anchorable base for the next layer. If you’re going for a blistered effect, you may want to paint on a nice, flat layer of latex you can pull out and “pop” for goo to ooze out of. Just try to keep the eventual weight and size of your planned wounds in mind and set up an area you think can support that. If your base layer begins to fail you can usually mend it by spreading more latex, although this may mean adjustments to your zombie’s “design.”
Step 2:
Once your base layer is dry and secure, you can begin affixing some more “tissue” to your wounds. How you form the tissue depends on the type of effect you’re trying to achieve.
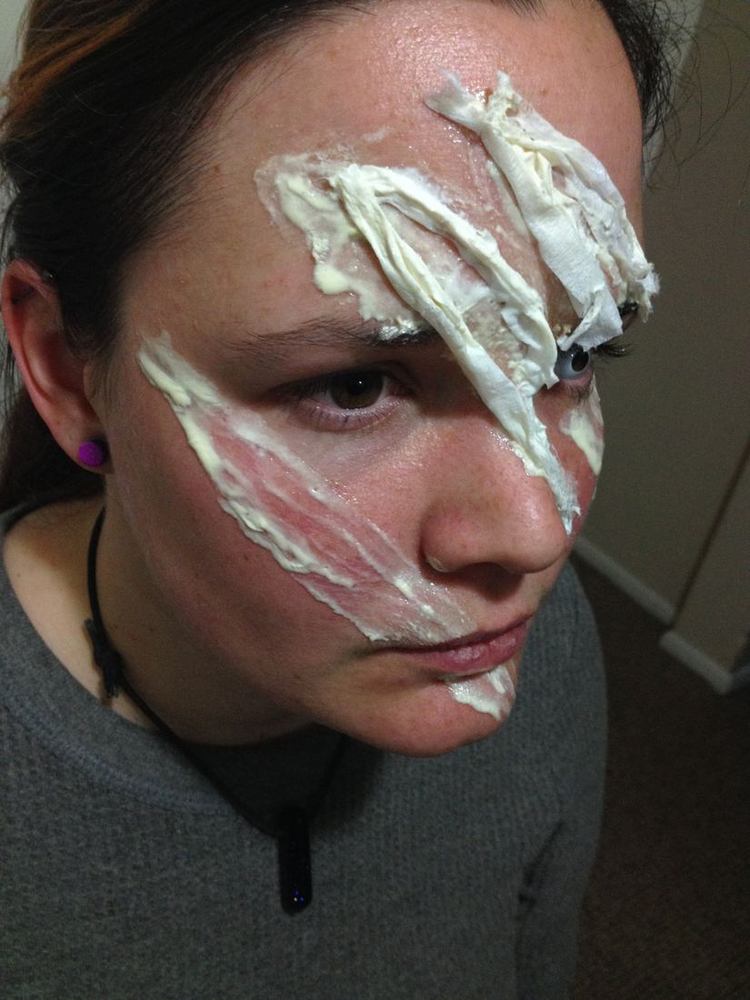
To make the sliced effect for Danielle’s face, we tore our paper into noodles and dipped them in the latex. After laying them along the edges of the wounds we painted over the whole mess heavily with more liquid latex; this helps hide the seams and edges that can make our new tissues look artificial.
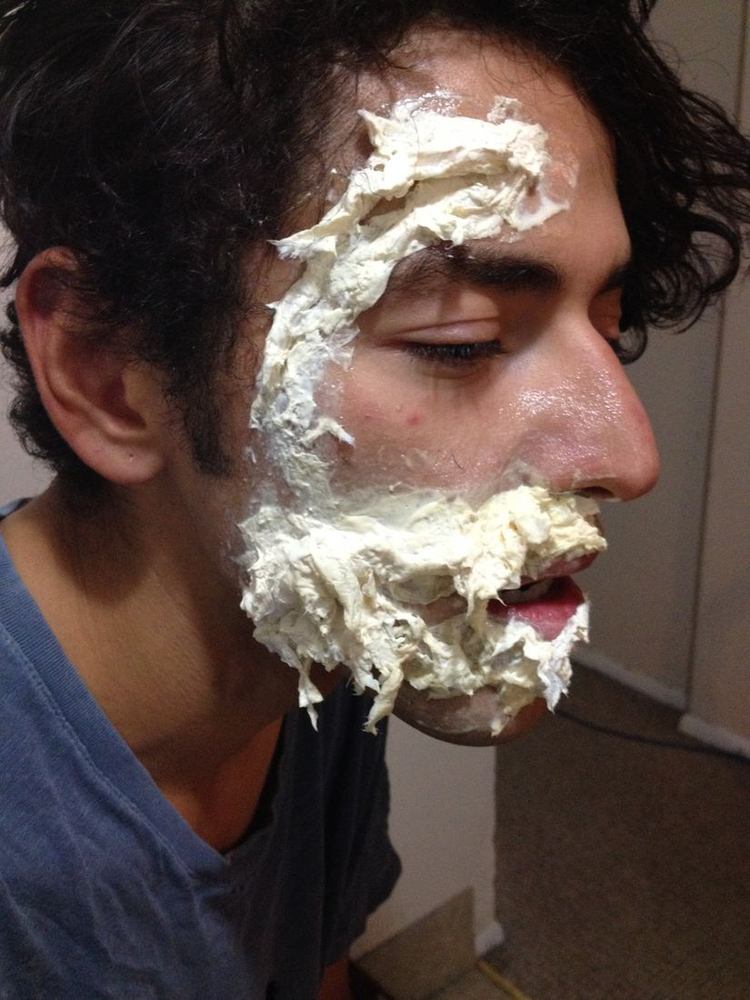
For Danny’s wound we wanted a rougher, more ragged look, so we again took some more roughly torn paper and affixed it to his face laying over the previous layers of paper and latex. After giving it a little time to dry and anchor itself to his face, we painted over the top of the paper with more latex, allowing it to drip over the structure and give it a naturally limp, ragged feel.
Step 3:
Honestly, this is really just more of Step 2.
After letting the first layer of real mess dry a bit more and get well anchored to the face, take a look at it and decide what features you want to accentuate or make more dramatic, then tack on a bit more tissue in those areas. Don’t be afraid to pinch or pull at the wound to mold it to your will. If it tears you can bond it back down with a bit more latex, but I usually have fun working these mistakes into the project- and torn latex actually has a nicely organic look to it.
After applying the full extent of your wound tissue, paint over the whole thing again with more latex. Don’t be afraid to paint “outside the lines”, it will help blend and hide the edges of the latex if you go a little past the previous coat. If you want to add any other damage to your zombie, now is the time to do it.
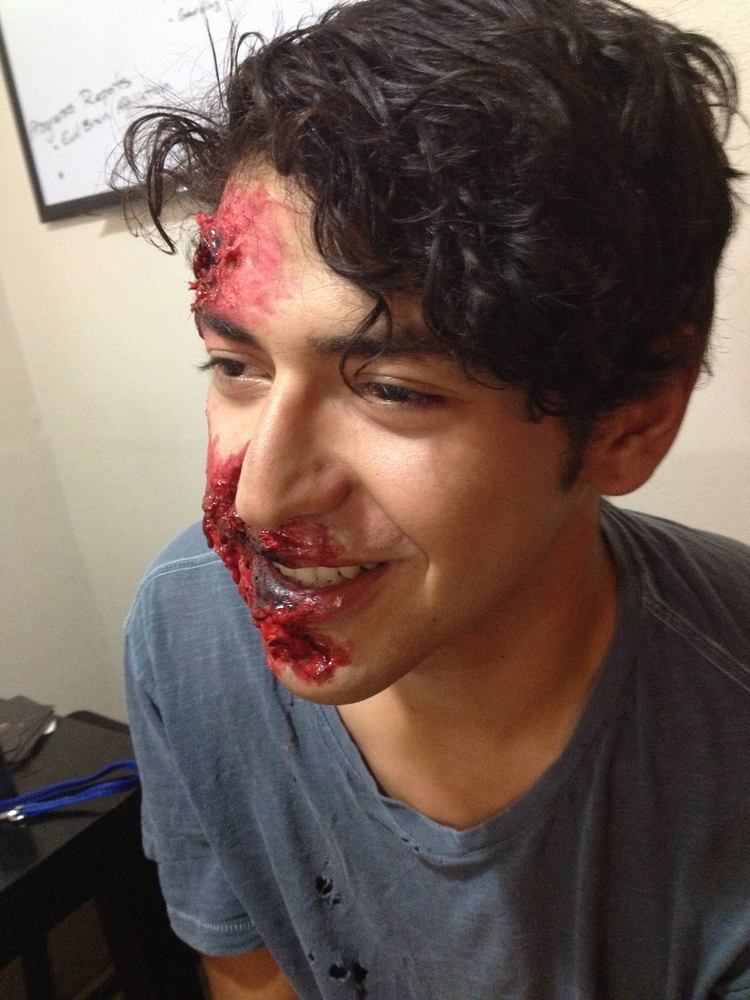
We decided to add a forehead gash to balance out Danny’s face.
Step 4:
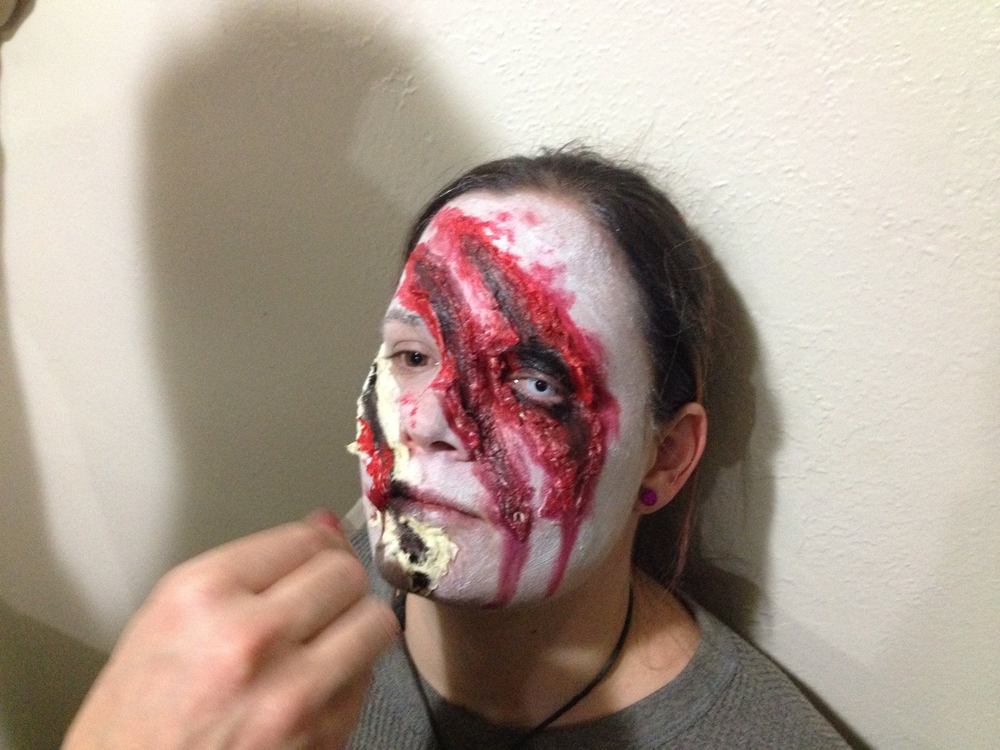
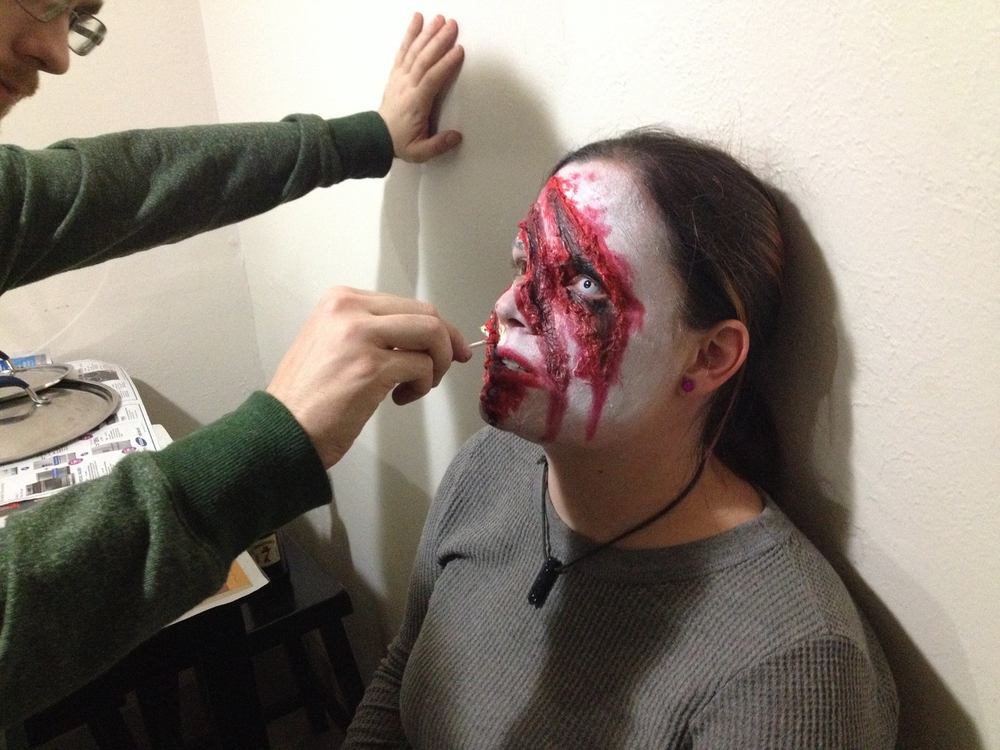
Begin painting! One reason I prefer to use cheap paint-sets is that it helps my pace at this stage to not be too worried about mixing colors or ruining the makeup. I begin with black, using it to obscure the center of the wounds then paint in the reds and accent some details with the dark brown. I recommend painting the black on especially thick and blending it outward slightly while painting in the subsequent colors.
After coloring in the wounds, paint lines of gravity down from the low-points of each wound in black and blend outward with red. You can also accent the outer edges of the wound-area with little splotches of red. Some pitted bits of latex may be hard to get the color into, but just make sure your sponge or q-tip or whatever is totally saturated in makeup and eventually you’ll persevere. Using your hands can make this process go by a bit more quickly as well, but is less safe for your clothing and more prone to mixing up makeup.
Finally, when the color is pretty much where you want it paint over the whole mess with a light glaze of our blood mixture, guiding it down the lines of gravity you established earlier. Paint it on again a little thicker over anywhere you painted black. If a little drips out of the wound, don’t worry we’ll deal with that in the next step.
Step 5:
This step is just really finishing the paint job we started in step 4. After letting the corn-syrup-blood-sauce drip where it wants to and generally settle down, take to the face with your makeup once last time. Find any spot in the wound it looks like blood should be drizzling out of and and drizzle it. Follow the tracks of any drips from the last step, tracing them first in black then adding a little red to support them. Flick little bits of blood mixture around the edges of wounds to suggest heavy impacts. When you’re done detailing, give each wound a healthy replenishing of blood and step back. You’re done.
Step 6:
Revel in the glory of your zombie-making prowess while your friend spends the remainder of the night with a sticky, uncomfortable face.
Final tips:
- If something starts coming apart usually the easier fix is just to attach more “tissue” to the area and be especially liberal with the latex.
- A blow drier can help immensely if you’re in a rush!
- Painting latex on is an ongoing process. You may notice it dries quickly in some areas and not-so-quickly in others due to the bizarre climates inherent in friends’ faces. Don’t worry about painting around the edges of still-wet latex. You’re making a zombie, after all, and ugly little nodules are par for the course.
- To remove, simply tear away the main mass of the latex and rinse the rest away in a long, hot shower. You might need two.
Full Gallery — Danielle
16 photos · click to enlarge
Full Gallery — Dani
17 photos · click to enlarge